When we took our
Project GTi on the
race track a few weeks ago one of the weak points that showed itself very quickly was the brakes. They had good stopping power, exactly what you'd expect from a hot hatch but they overheated after just half a lap, which was pretty unexpected. The brakes on our GTi clearly needed some attention.
Taking a look at the discs on the car it was clear to see that they'd seen better days so we ordered in some replacements. We also ordered new pads front and rear as you should never re-fit old pads when fitting new discs. A complete
brake fluid change was also on the cards as it probably hasn't been done for years but we'll get to that another day.
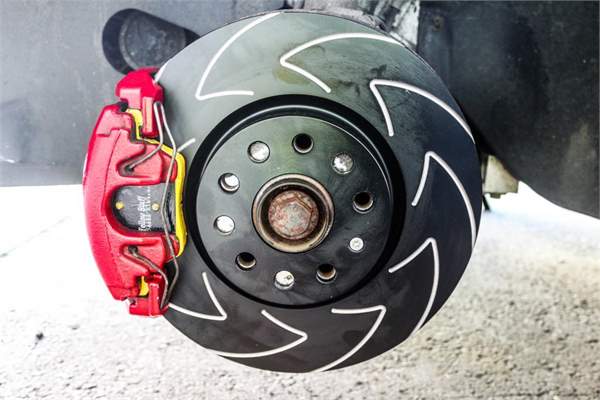
Seeing as we want to improve the overall performance of our GTi we decided to fit uprated discs and pads whilst sticking to the standard size to keep costs down. We chose the latest Blade discs and Yellow Stuff pads from EBC. The image below shows the standard brake set up on the front of the car.
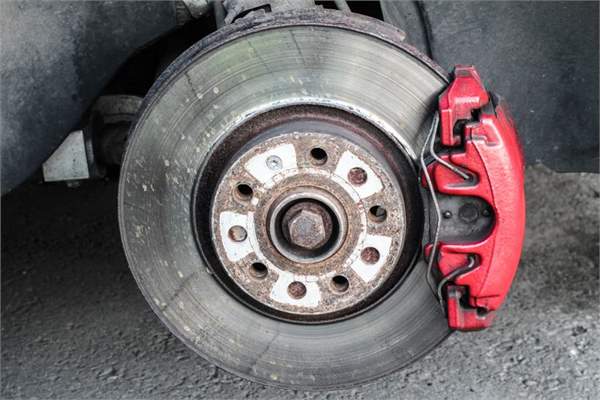
With the car supported securely on
axle stands unclip the brake pad wear lead
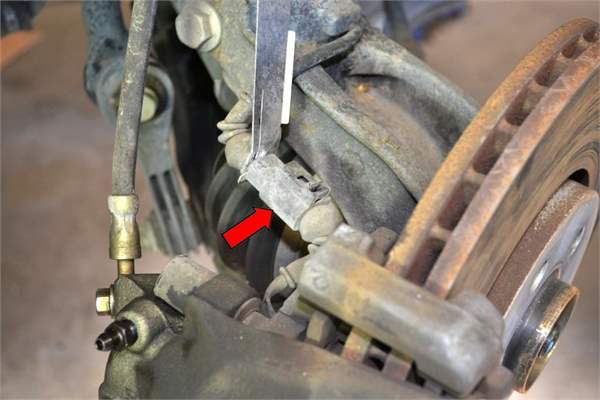
Then with a flat screw driver carefully prise off the pad retaining clip
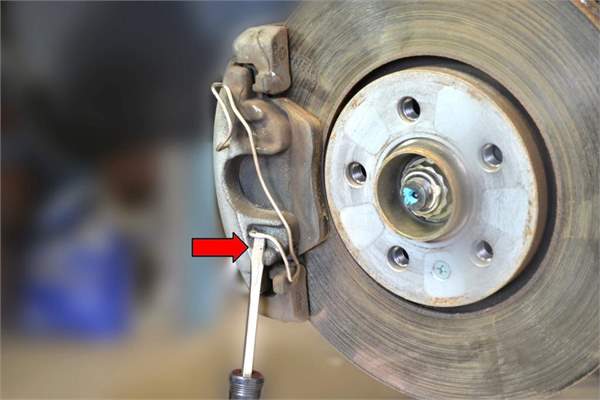
Using a 7mm Allen key, undo and remove the two caliper guide pins. They are located behind plastic covers with caps that just prise off.
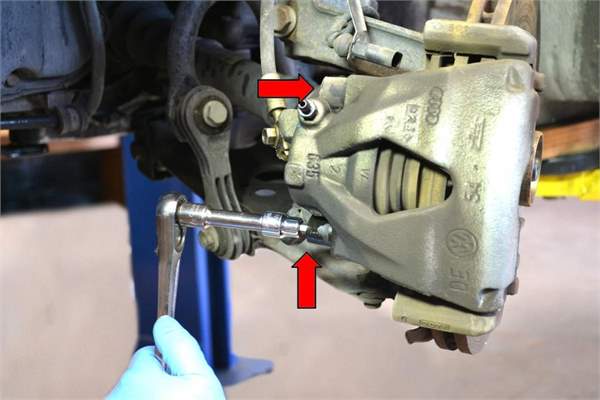
Next, remove the two large bolts holding the caliper carrier to the upright. The caliper and carrier should then pull away from the disc. If the disc is badly worn like ours was there will be a lip on the outside edge of the disc which can be tricky to get the pads and caliper over. With the caliper removed it's important not to put any strain on the rubber brake hose so use a
bungee cord to support the caliper (you should be able to hang it off the coil spring quite easily)
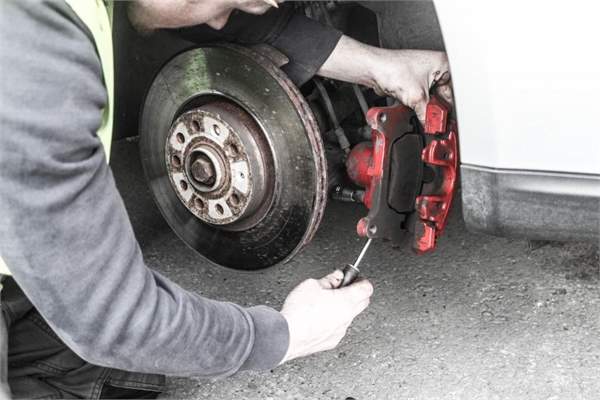
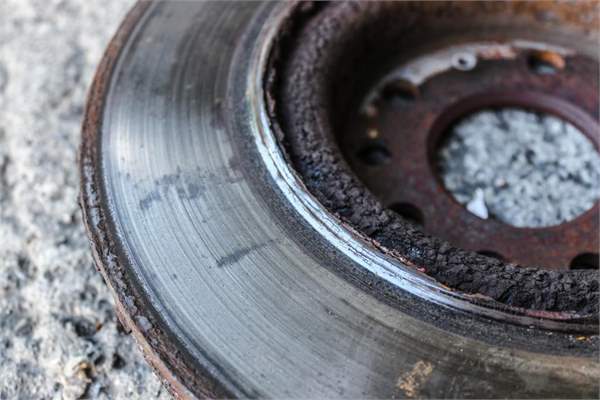
Before you can remove the disc, you'll need to undo the locating screw. These can often be badly corroded and you may need an impact driver to remove it. With the screw removed the disc is ready to come off. It's quite likely that it will be corroded to the hub so a few gentle taps with a
rubber mallet may be needed. As you can see from the image below our disc was in pretty bad shape!
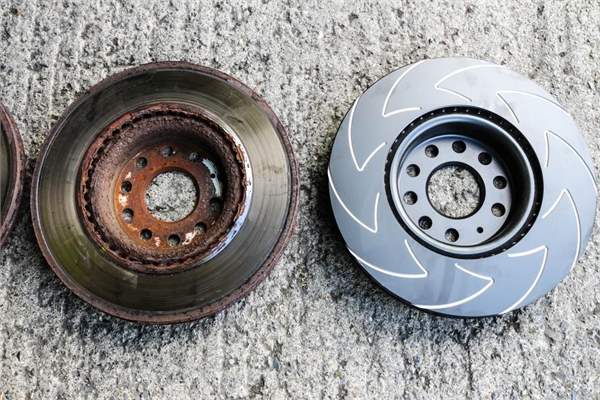
Here you can see the old worn disc alongside the new EBC Blade disc. It's always a good idea to give any new discs a thorough cleaning with a specialist
brake cleaner as some discs are supplied with a protective oily coating to stop them from corroding whilst in transit.
Before fitting your new discs be sure to thoroughly clean the mounting surface on the hub. Any debris or rust left on the hub here can result in unwanted vibrations under braking.
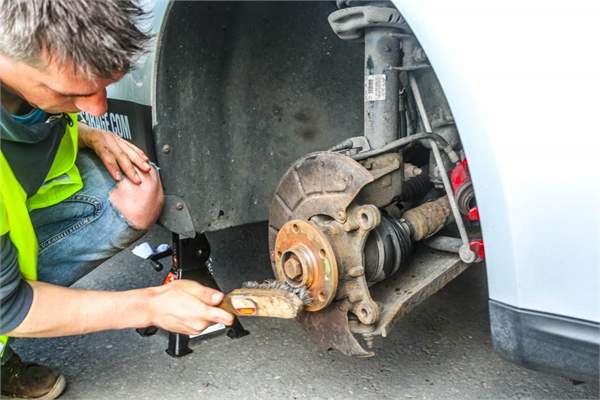
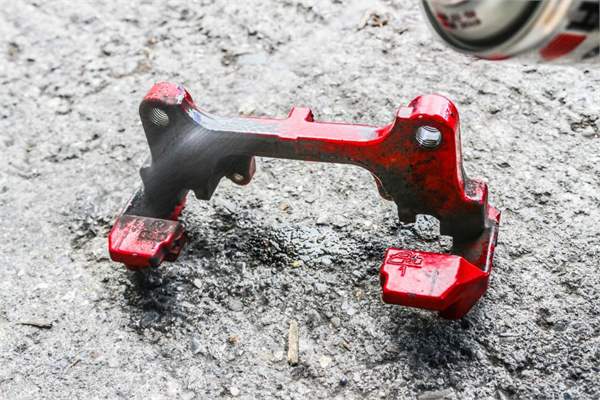
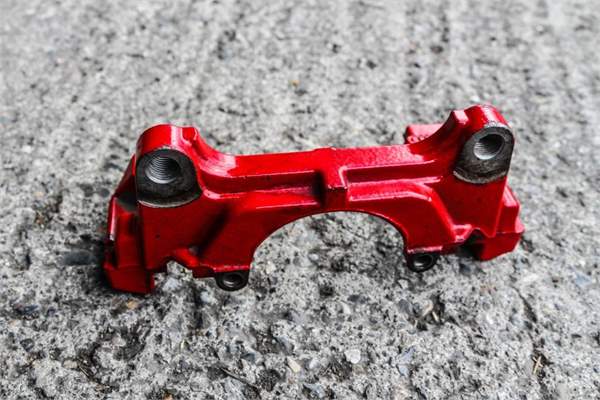
Moving on to the calipers and caliper carriers, we gave them a quick clean up with
brake cleaner and a
wire brush.
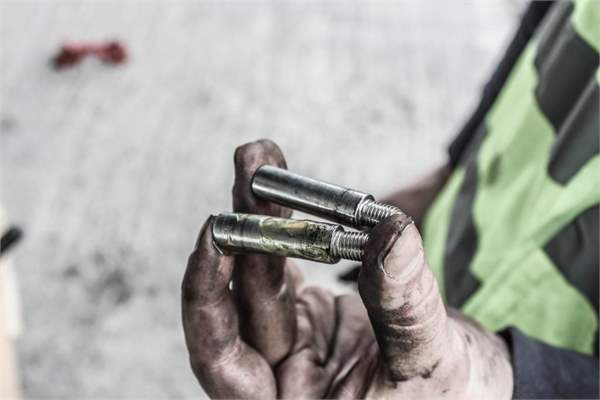
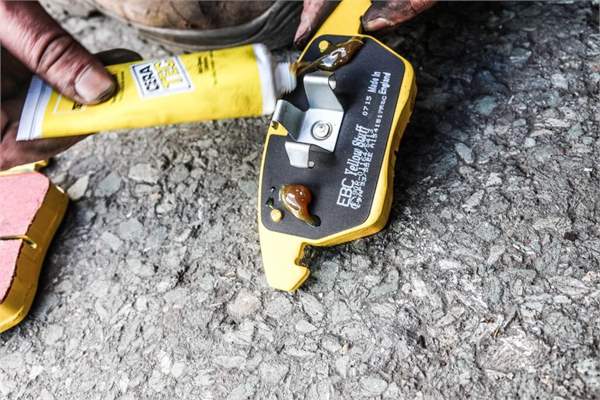
Clean up and grease your caliper guide pins before re-fitting them. if your pads were worn more on one side of the disc than the other it can be a sign that the caliper was sticking and wasn't sliding properly on the guide pins. Use a specialist brake grease that is designed to deal with high temperatures such as
CeraTec and be extremely careful not to get any on the friction surfaces of the pads or discs.
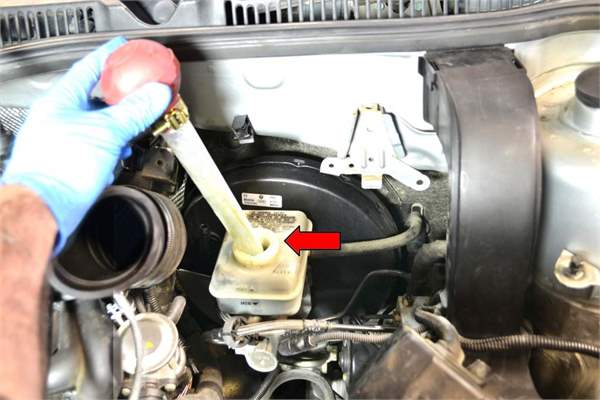
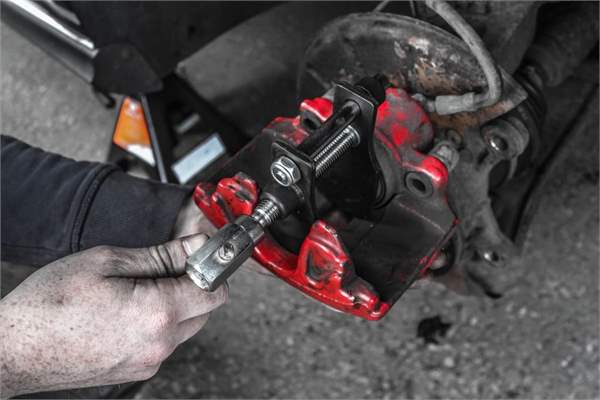
The next step is to remove the cap from the brake fluid reservoir. You're probably going to need to compress the brake caliper piston in order to fit the new pads and this will in turn push fluid back into the reservoir. You may need to use a pipette /Turkey baster to remove a small amount of brake fluid if the reservoir is very full. It's important no dirt gets into the brake fluid so make sure the area is clean before you open the cap.
If you do have to compress the caliper piston, using a special compressor like
this one from Draper makes the job a lot easier and reduces the risc of damaging the rubber seals/boot around the piston. (**note, some VAG cars have a caliper on the rear that requires a
special tool to wind the piston back in, it doesn't just compress**)
A small amount of brake assembly grease (again make sure you use the right stuff) on the back of the pads can stop them from squealing
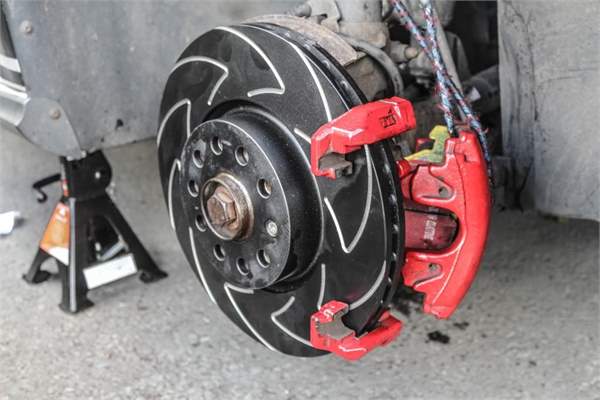
Re-assembly is just the reverse process from the above. Make sure you re-fit and tighten the disc locating screw. The correct torque setting for the carrier needs to be achieved in 2 stages. First tighten to 15Nm then tighten to 200Nm. The torque setting for the caliper guide pins is 30Nm
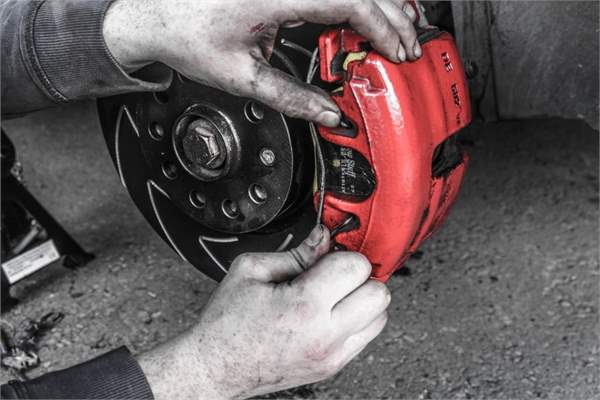
With the 2nd pad in place, carrier bolts and guide pins torqued correctly you can re-fit the pad retaining clip. Make sure the cap is back on the Brake fluid reservoir too!
Then press the brake pedal firmly a couple of times to ensure the pads are seated correctly. Re check the brake fluid level and top up if necessary.
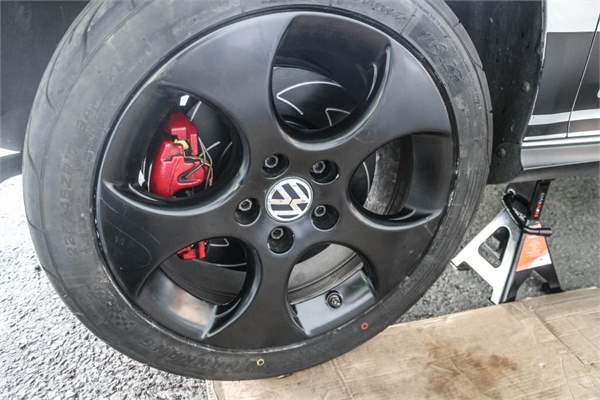
Re-fit the wheel, tighten the wheel bolts by hand in a diagonal pattern ensuring the wheel is seated correctly then tighten fully once the car is back on the ground. The correct toque setting for the wheel bolts on the Mk5 GTi is 120Nm
 Important Safety Notes:
- Obviously brakes are a safety critical component on your car. Always make sure you have someone competent/qualified to help when working on the braking system if you are unsure of a process or of your own ability.
- New brake discs and pads should always be changed as an axle set. ie front left and front right or rear left and rear right should be changed at the same time. Never replace just one side.
- If fitting new discs, new pads should also be fitted.
- When working underneath a car always support it securely with axle stands.
Bedding In:
New brakes need to be 'bedded in' and will not work at 100% of their capacity from the very beginning so exercise extreme caution the first few times you press the brake pedal as the braking performance may be less than you were expecting. It's also like that you'll experience more brake noise than normal the first few times you stop as the protective coating (if applied) wears off. here are EBC's own detailed bedding in instructions:
In Street use situations … Bedding in when the red EBC surface coating (marked on the pads as Brake In) is applied. Best procedure is to drive gently avoiding harsh braking unless in an emergency for first 100 miles. In the second 100 miles (up to 200) you can use gently increasing brake pressures when using the brakes.
Only after 200 miles urban driving (not 200 miles on a freeway where brakes are almost unused) should you attempt to apply heavy load and heat to the brakes. To do this final bedding on a QUIET ROAD in safe traffic apply the brakes and slow from 60 to 10 MPH five times in a row. Then drive slowly for a few minutes if safe to do so to allow the brakes to cool. Try to avoid coming to a rest whilst the brakes are heated.
A smell may be noticed from the warm brakes, this is normal. Repeat this procedure a second time after the brakes have TOTALLY cooled down. EBC pads get better with miles. Even after this bed in procedure it can take up to 1500 miles before the pads are at their best. In the meantime the pads will be good and safe but true potential not realised. EBC makes performance pads that last, they do not bed in within 5 minutes driving. Noises will be more likely during the first 1000-1500 miles use whilst this chemical bedding takes place.
NEVER attempt to sand or scotchbrite brake pads to assist it bedding in or noise reduction,this will only make things worse by taking the pads “Off-Flat” and require hundreds of miles driving to seat them again during which time the brakes will feel very dull. The only way to seat pads is against the rotor they will be used on and by following our bedding recommendation.
Bedding in for trackday or race use … We remind you there is NO WARRANTY on any EBC product for race use due to the very varying conditions that can be seen. However, care bedding pads in and monitoring wear will get the best from our products.
Most EBC pads including Yellow range pads now have the brake in coating. If possible and using a street based car, fit the pads before the race use and bed in as above for street use. Try to get 200-300 miles urban driving on the pads before racing them. If this is NOT possible and you fit at the track bed like this.
Drive two laps steadily applying the brakes every few seconds and then coast for a full lap without any unnecessary braking to allow pads and rotors to cool down. Drive a third lap applying the brakes slightly harder each time and again drive a cooldown lap. Do NOT pull up and park the car with the brakes red hot, try to let them cool as much as possible before coming to a rest. It is also important to understand that the pads must be geometrically matched to the rotor (flat and parallel) before they will bed in chemically. If you do the above bed in and get violent fade first use you MUST repeat the bedding procedure. We get lots of new customers calling in saying my brakes have faded and when they send a digital photo the pad is only touching on 70-80% of its surface area. Fade early in a pads life is almost a good thing. It is called GREEN fade and will disappear, so if you suffer Green fade (you will notice this by smell), you are on the right path and this is not a negative. If you are getting fade after 20 laps and the pads are part worn, then something else needs looking into such as material choice, bleeding of the system, driving style etc …
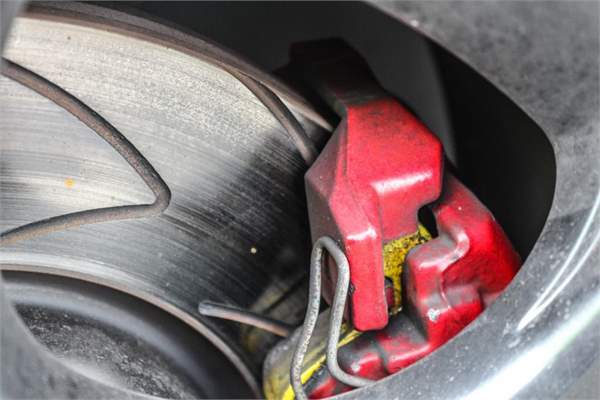
Check back soon when we'll be replacing the rear discs and pads and flushing out the brake fluid and replacing it with some high performance racing stuff!