Blown headlight, brake-light, reverse light and indicator bulbs are one of the main causes of NCT and MOT failure. They are also a driving hazard, so it’s worth knowing how to change your car bulbs. For the uninitiated (like myself) this can seem like an impossible task. Every car is a different shape and size and so the bulb access points will vary with every car make and model.
If you have never changed your car bulbs before make sure you are feeling calm and relaxed and that you have plenty of time to figure things out at your leisure. The first time I changed a headlight bulb on my car it took me about half an hour, but the next time only about 10 mins total! So remember to take your time and keep calm!
Your car owners’ manual should provide you with the information you need to locate the position of your bulbs. but failing that, the internet, youtube especially is a great source of model-specific DIY guides. We've also provided some general information to make the task easier. Remember every car is different so take this as a general guideline to help you figure things out.
Headlight Bulbs
It’s rather obvious where the headlight bulbs are situated on your car but gaining access to them can be tricky. Firstly, make sure to turn off your engine before opening the bonnet. By looking at the position of the headlights externally, you should be able to tell the location of the bulbs beneath the bonnet.

Depending on your car, it will either be easy to access the bulb compartment or you will need to remove some components to gain access. Once you have accessed the headlight bulb compartment pull out the electrical connection plug (it may be help in with a metal clip). Once the clip is released take out the old bulb and insert the new bulb in the same position (holding it at the base).
Be careful not to touch the new bulb’s glass as it can damage the bulb and cause it to blow straight away. Once the bulb is fitted, squeeze the clip back in place and re connect the electrical connection on the back of the bulb, then put the cover back on the rear of the bulb compartment. Test the light is working before replacing any engine/body components that you may have needed to remove.
Indicator/Sidelight Bulbs
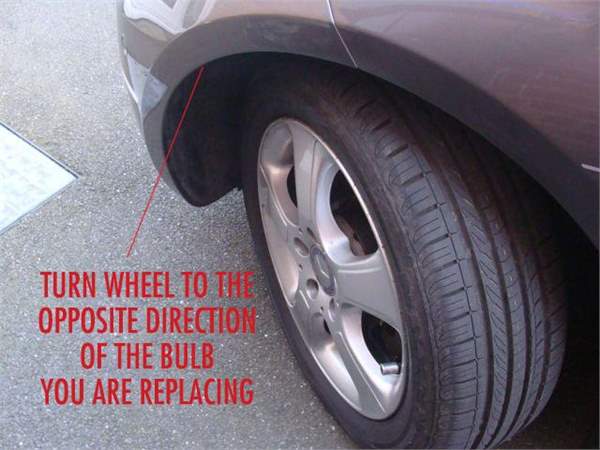
Instead of going through the bonnet, the sidelight compartment is often located behind the wheel arch or from behind the bumper of your car. Your owners’ manual should show you where the point of access is. but if not the internet again should be your next port of call. If the access point is behind the wheel arch you will need to first turn the wheel to the opposite side of the bulb to be replaced.

This creates a gap big enough to reveal the sidelight bulb compartment and to change it. For most car models you simply remove the screws holding the plastic lens in place, remove the bulb and replace with the new one.
Brake, Tail and Reverse Light Bulbs
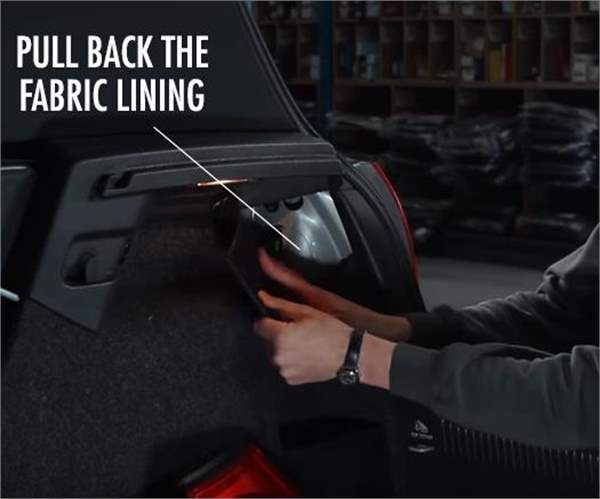
Brake, tail and reverse lights are usually the easiest bulbs to replace. You will either be removing the outside plastic lens cover or accessing the bulb compartment from the boot. Firstly, check the lens covers for small or hidden screws. If the screws are on the outside, then usually you need to remove the cover to gain access to the bulb. Do not force the cover off if there is no obvious way of removing it! You could end up damaging the cover and costing yourself a lot of money. If there are no screws visible from the outside, open your boot and look for access points from the inside. You may need to move back the fabric lining or unscrew a small door to access the compartment.

Once you have located the bulb compartment, remove the bulb and replace.
Purchasing the Correct Bulbs
If you are unsure of the bulb type, simply take the faulty bulb with you to your car parts store or visit
MicksGarage.com. On our website you can simply
enter your car details to find the correct bulbs quickly and easily.