Our mk5 Golf GTi project car recently gave us a minor heart attack when the oil pressure warning light came on, shortly followed by the big red 'STOP ENGINE' light! We were out on track when it happened, trying to set a lap time and feared the worst! We left it for a few minutes then fired it up again to see if we could limp back to the pits. Thankfully there was no knocking and no warning light at tick-over but as soon as the revs rose over 2,000 rpm the oil pressure warning came back on. We managed to coast back in.
The lack of any knocking and the fact that the oil pressure seemed ok at idle was a good sign that terminal damage hadn't been done, but we were going to have to take the sump off to investigate. We'd heard about the Golf GTI oil strainer / oil pickup pipe which could be problematic on these engines and had an inkling this was the cause of our issues.....thankfully we were right. Here's how went about fixing the problem.
What you'll need:
First, jack the front of the car up and support it on axle stands or
use a pair of ramps.
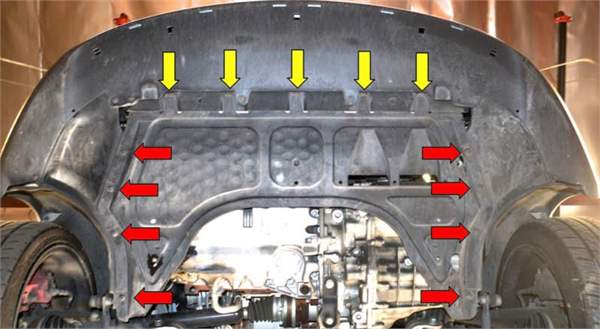
Remove the centre section of the plastic undertray (held on with T25 Torx bits)
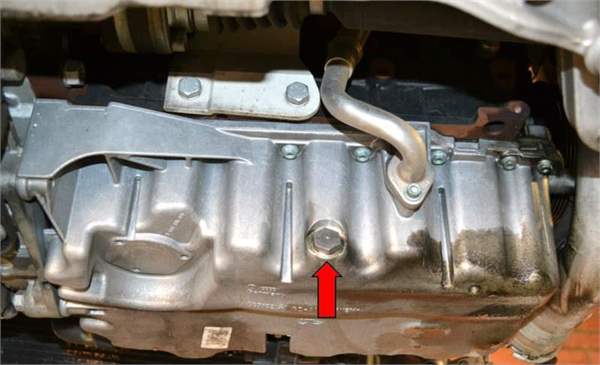
Drain the oil from the sump via the sump plug (19mm socket) if you remove the oil filler cap the oil will flow out more quickly. Using a proper drain pan can also help keep mess and spills to a minimum. Some mk5 GTi's have a sump like the one above which doesn't have an oil level sensor built in (see the 3 mounting holes in the recessed section where it would normally fit) and some do have an oil level sensor built in, like the one pictured below.
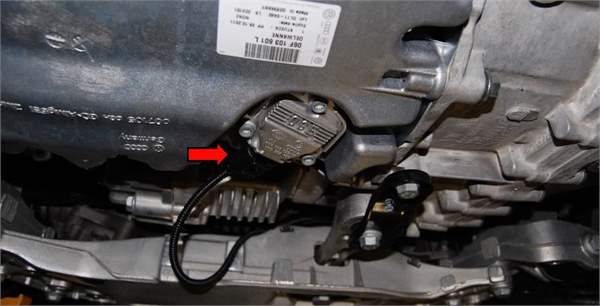
If your sump does have the sensor you just need to disconnect the plug
Next remove the two T25 Torx bolts which attach the intercooler pipe to the sump
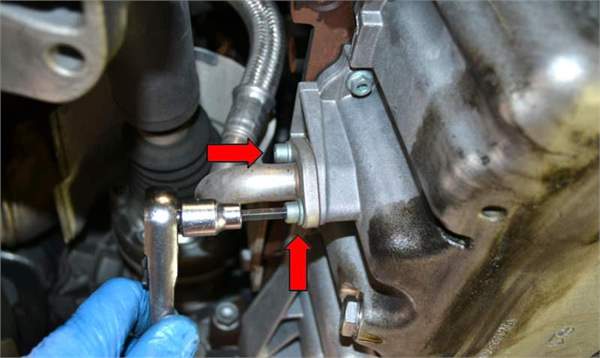
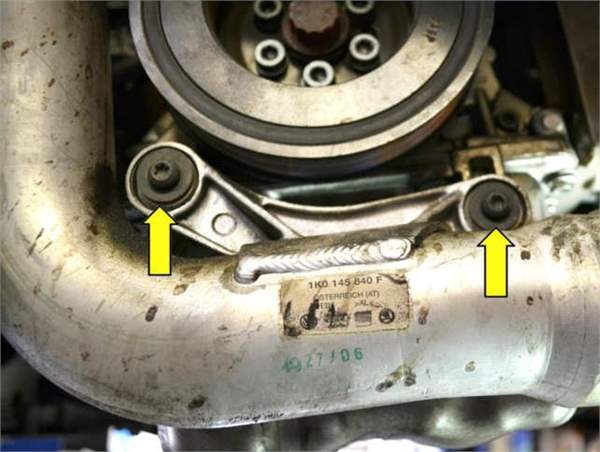
Then remove the two 5mm Allen bolts which attach the turbo oil return pipe to the sump - Some oil will drip out so be ready with your drain pan.
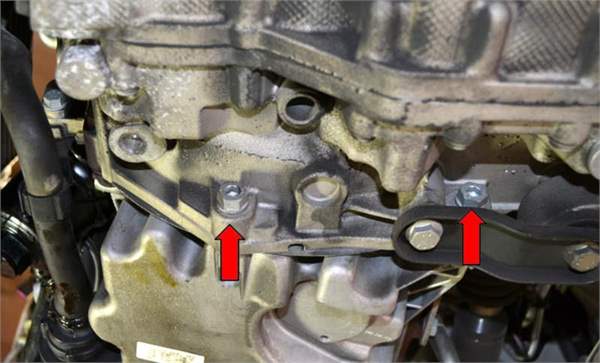
Remove the three 16mm bolts from the gearbox side of the sump (you can't see the 3rd & longest bolt in this picture but it's toward the front of the engine)
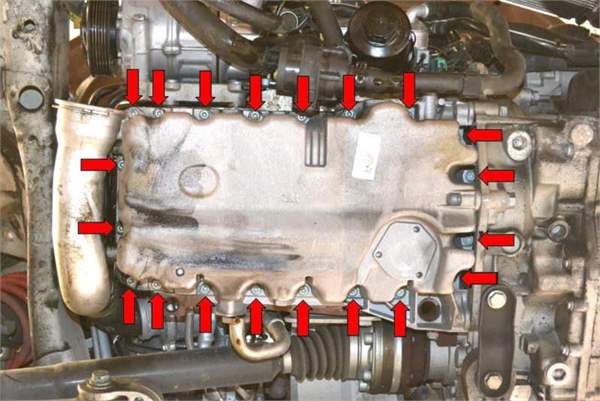
Remove the twenty 5mm Allen bolts (they also have a 10mm head so you can use a socket if you prefer) Two of the bolts on the gearbox side are quite difficult to get out as you can't get a socket straight on to them, you'll need a ball headed Allen key or a wobbly (UJ) extension to get at them properly. When you have all of the bolts removed, it's unlikely that the sump will just fall off (it is possible though so be prepared!!) Some gentle taps with a rubber mallet or some very careful prying with a screw driver should loosen it. If you're using a screw driver look out for the special tabs built into the sump for this purpose and be extremely careful not to damage the mating surface between the sump and the block. Remember, it's made of aluminium and will crack easily!
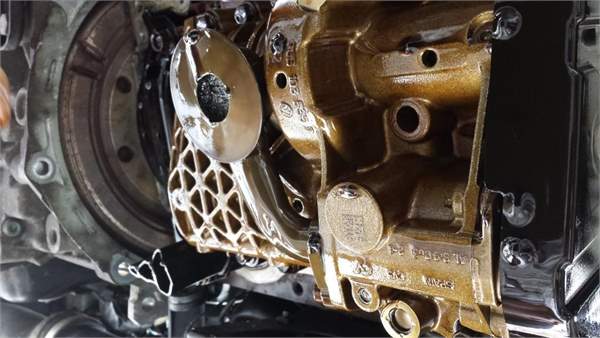
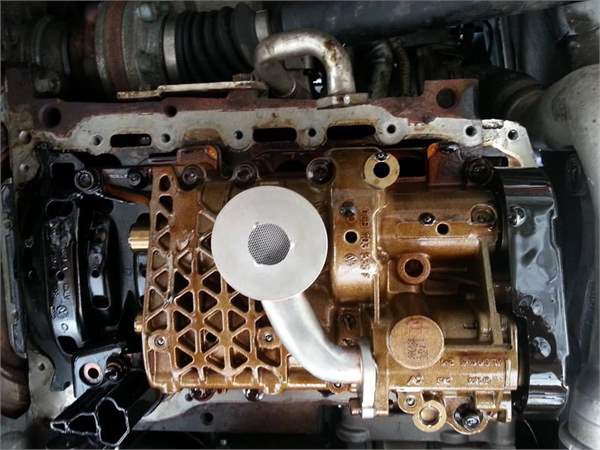
With the sump removed this is what you will see. The gauze on the oil strainer is quite badly blocked and this is what was causing our oil pressure issues. Remove the single 5mm bolt holding the strainer on and gently remove it. With the sump and strainer removed we cleaned them both in a chemical bath, but a basin of petrol or plenty of brake cleaner will work just fine. Next we power washed both parts until clean and finally blew all the water out with an air line. If you're doing this at home and don't have a chemical bath or a compressor, don't worry, just make sure there is no water present when you reassemble everything.
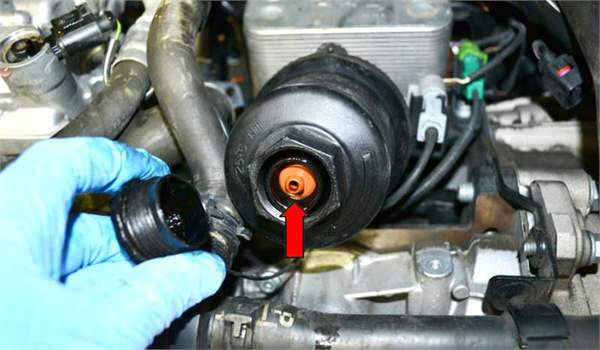
The image above shows the cleaned oil strainer re-fitted to the engine. Before putting the sump back on it makes sense to change the oil filter. Unscrew the plastic cap at the bottom of the housing and use a screwdriver to gently push the orange valve upwards to release the oil caught in the filter housing (you'll need your drain pan again) Next remove the housing and filter using a 36mm socket. Clean out the housing, make sure the one-way valve is re-seated correctly, fit the new seal (which comes with the new filter) making sure to apply a little bit of clean oil to it before fitting into place, pop the new filter into the housing, fill it up with clean oil then re-fit the filter housing and tighten to 25nm
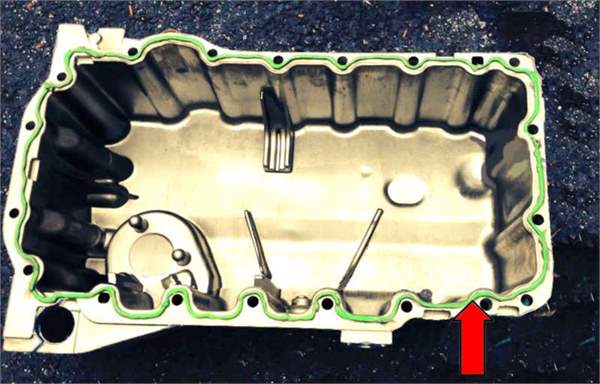
The last job before re-fitting the sump is to make sure the mating surface on the block and the sump are clean, dry and free from any old sealant. When applying new sealant you need a steady hand and a nice thin, even bead. Too much and the sealant can spill over the inside of the join and could come off and potentially block your oil strainer again.
Install the bolts and hand tighten in a criss-cross pattern until all are hand tight and then torque to specs, again in a criss-cross pattern. Refit the turbo return pipe and the oil level sensor connector and wait at least 30 minutes before filling with oil to let the sealant go off.....and that's it....oh, don't forget to re-fit your oil filler cap, it's easily forgotten!
You can read more articles in the
Project GTi series here


