What is a window regulator
Window regulators are the mechanisms inside your car door that allow you to open and close your windows. Most modern cars have electric windows which are operated using a switch. The window regulators and motors that power them can become worn or damaged over time. Window regulator repair is sometimes possible and in this article, we go through some common problems and solutions. A more straightforward solution is often replacing a window regular outright but is not always necesary.
Factors such as window stickers or car window tinting which essentially increases the thickness of the window can cause extra resistance and put stress on the window mechanism, as can operating the windows in frosty conditions when they are frozen shut. Certain makes and models of car are known for having electric window issues such as the Renault Megane which has a prolific electric window fault.
If you have issues with your electric windows our guide to common electric window problems & solutions will help in figuring what exactly needs to be fixed or replaced.
Driver Side Windows are checked during the MOT or NCT (National Car Test). They can result in a test failure for the following reasons:
- Insecure.
- Window opening mechanism of driver’s window not operating.
Signs of a malfunctioning window regulator:
- Window does not go up or down when buttons are pressed.
- Operating the window makes an unusual or loud sound.
- Window drops to one side.
- Window closes very slowly or fails to close completely
If the window lifter needs to be replaced, enter your registration number on our
window regulators page and click Go. Then use the filtering options on the left hand side to filter for the regulator you need i.e, left or right, front or rear. You'll find the correct window regulator to fit your car this way and get it right first time.
Did You Know?
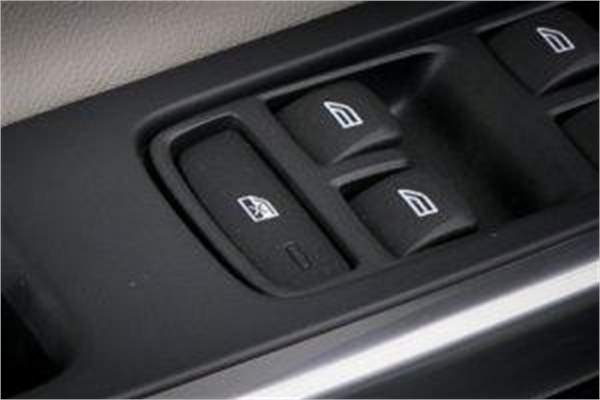
When testing the windows, use both the driver's side master control switch and the switch at the malfunctioning window. If one of these switches operates the window as normal, then you know that there is a problem with one of the switches. 
Almost all cars with electric windows have a lock button that cuts power to all windows apart from the driver’s side for safety reasons. If your windows aren't working It's worth checking if this button has been pressed accidentally!
There are 4 main reasons for a malfunctioning electric window:
- Blown fuse
- Faulty window switch
- Faulty window motor
- Faulty window regulator
If you can hear the motor running (a humming sound) when you press the buttons to operate the window, then you can rule out a faulty window switch and a blown fuse. You should skip to checking the motor and window regulator. If you can't hear any sound when you press the buttons then it's time to check the fuse.
Blown Fuse:
If all the windows have stopped working then the most likely cause is a blown
fuse. The location of the
fuse box will be in the owners manual (or
Haynes Workshop manual). You may need a flat head
screwdriver to pry open the fuse box cover. In most vehicles, there is a diagram on the inside of the cover which illustrates the location and purpose of each fuse. Keeping an assortment of fuses in the garage is always a good idea as they're used for virtually every electrical function on your car and they're not overly expensive. You can see our range of
fuses hereTesting a Fuse with a Voltmeter: The safest method for testing a fuse is to use a voltmeter (or a multimeter that is set to volts). Turn your ignition to the on position and clamp the negative (black) lead to a ground. Locate the two exposed square pieces of metal that are on top of the fuse in question, using the positive (red) lead touch the first metal square, then do the same to the other, as shown in the image to the left.
The voltage reading should be between 12-14 volts. Correct readings on both sides of the fuse indicate that the fuse is not blown and is working. If only one side of the fuse is giving a reading then the fuse is blown. If neither side gives a reading, current is not flowing into either side of the fuse and there is an electrical problem upward of that area on the circuit.
Note: Do not use a voltmeter that is set to Ohms to test a live electrical circuit.
Visually Checking a Fuse:
Use a fuse puller to extract the fuse from the socket. (Some vehicles will have this tool inside the fuse box.) Pull on the fuse gently to remove it, you may need to wriggle it slightly but be careful not to damage it or the socket. If you don't have a fuse puller, you can use long-nose pliers instead. When the fuse has been removed, check the metal strip inside for any breaks or fractures.
If the metal is strip is broken as shown in the image below, then the fuse is blown and needs to replaced. It's critically important to replace it with a fuse of the exact same amperage rating. This rating is the number that is written on top of the fuse or stated in the fuse box cover. Using a fuse of lower or greater amperage could result in a fire or damage other components on the car.
Tip: Check for loose connections or wires around the fuse box. Tighten them and check to see if the windows work. A little electrical contact spray can also help.
Tip: Check the window switches for any dirt or loose/worn cables that could be causing the window to malfunction. If the fuses are not blown then a deeper investigation is needed.
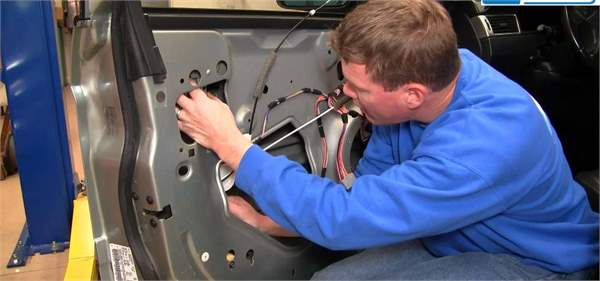
The door panel will need to be removed. It's important to follow manufacturers procedures for removing this panel to avoid any damage. The next step is to remove the moisture barrier liner by slowly peeling it off and placing it in a safe place. Once this is done, visually inspect the plastic guides, connections, wiring and components for any sign of damage or if any of them are not secure. 
Checking Power to the motor
Using a digital volt meter, test the connection that is going to the motor for current. Motors with two wires are analogue systems and are safe to test. 
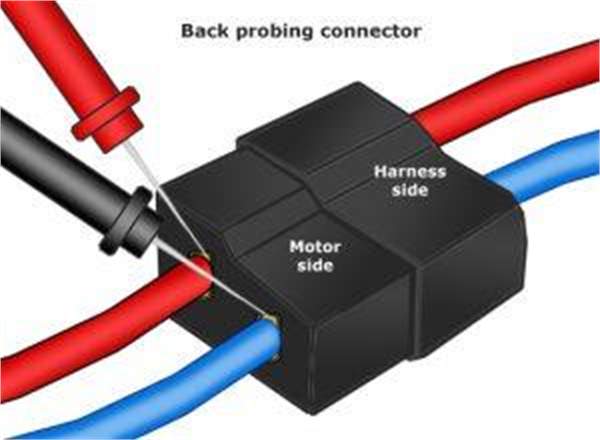
However, motors with more than two wires are called digital systems and a professional diagnosis is recommended. Use the back probing method to test if power is flowing through the connector leading to the motor when the window switch is pressed (remember to reconnect the window switch when testing). Back probe testing involves inserting the probes (leads) into the motor side of the connector as shown in the image below.
Tip: Avoid piercing any wires or front probing the connector as this could lead to further problems.
When checking the wires you are looking for a reading of either -12 volts or 12 volts. If the reading shows full current and the motor is not running it means that the motor is at a fault

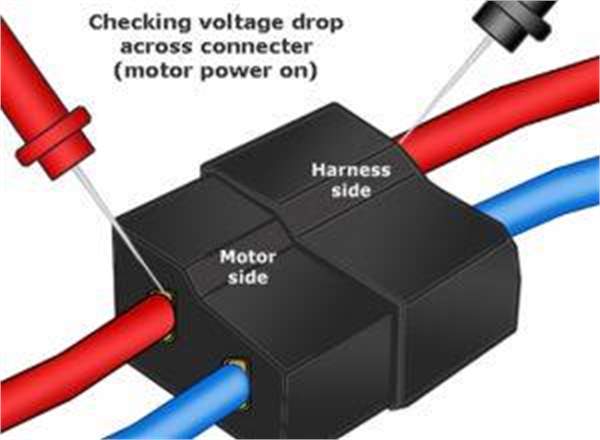
A lower reading means that sufficient current is not reaching the motor and that the problem is further up the circuit. Using the drop testing voltage method you can test for any differences in volts at either side of the connector i.e. if voltage reads 10 volts at the motor side of the connector and the overall voltage is 12 volts there is resistance in the circuit that could cause the motor to run abnormally.
Tip: It's recommended to change the motor and window regulator at the same time. If one of them was to break again, you will be back to the same situation.
Tips to Extend the Life of Window Regulators & Motors
- As soon as the window is fully up or down release the button, keeping it pressed can put tremendous strain on the motor and the regulator components.
- Using rubber care products such as Nextzett Gummi Pflege or silicone spray can keep rubber seals from getting hard and drying out. This will allow the window to go up and down freely.
If you've been through all the tests and checks above and need to replace your window regulator or motor, you'll find them on our website here. You can also check out our window regulator Youtube playlist to see if we have a 'How To' video for your car
Sample Fitting Video:
Here's an example of one the most popular window regulator fitting videos. This video is for a Ford Fiesta: We hope this has helped answer some of your questions and thanks for reading!